Hi! Today I am going to share with you how we can create multiple stores in CS Cart. Whenever you buy CS Cart license you should specify the number of storefronts you want to have in CS Cart and in ultimate edition, you by default have the options of creating multiple storefronts.
Before explaining the need for multiple storefronts let me give you a brief description of what is CS Cart and the need of having multiple storefronts in CS Cart. CS-Cart development allows you to create multiple storefronts with unique designs, categories, settings, and database management. CS Cart is a paid CMS. There are two variants of CS Cart available, one is CS Cart and another is multi-vendor. Having multiple storefronts means that you will be having one single admin panel for all your storefronts i.e. all storefronts will be managed by a single admin panel.
You can access all the data of your storefronts from one single admin panel just by clicking on the store icon in the admin panel. Doing so, you will get all your data related to that particular store displayed like products, categories, payment methods, etc. You don’t have to go to every site admin panel and make changes or access your orders etc, you will get every data in the single admin panel. This is the main advantage of using multiple storefronts.
Let’s say you want to sell different types of products in your store. Yes, you can sell every product type from the same store as well by defining different categories. However, let’s say you want to sell laptops, mobiles or electronics items from one store and clothing from another store and you want to have one store at www.abc.com and other at www.xyz.com. Or, you just want to sell almost the same products from both stores but at different prices.
So both above scenarios can be accomplished by creating different storefronts.
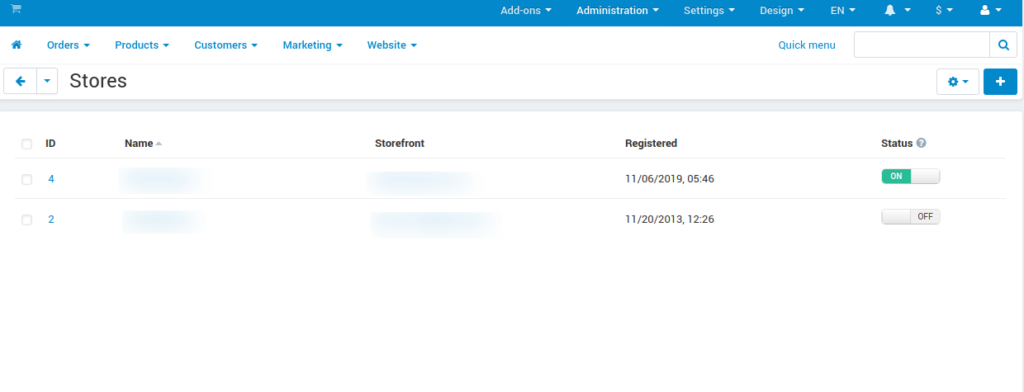
In case you plan to sell the same products from both stores but with different names or prices, you can share the products for both stores or any number of stores that you want to create. This way, it would be much easier for you to manage products as you would have the option of managing both the store products at the same time. You can save different data in them as well. Go to the Administration menu in the admin panel and click on “Stores”. The following screen will arrive and there you can create a new storefront.

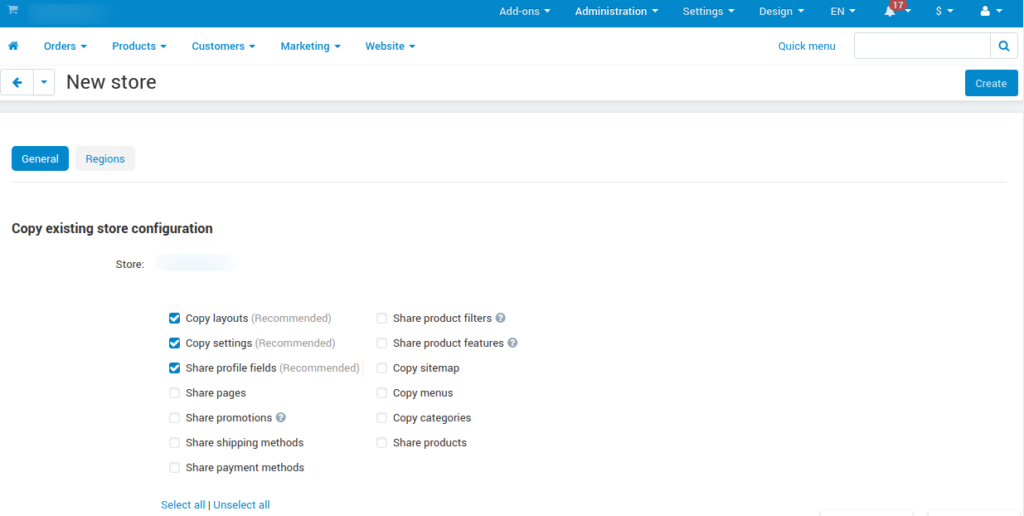
By clicking on the plus icon you can create a new storefront for your website. I am attaching the screenshot here for better understanding. You need to fill in all the details related to your new storefront. Also make sure to enter the correct data for the company as the data that you will fill in will be displayed in the emails, invoices being sent to customers like order email, etc.

Also, you can copy data from your existing store as you want to sell the same products from every store. In CS Cart Multivendor version, you have the option of copying/sharing particular data like products, layouts, shipping, payment methods, etc. Fill in the information and save. Your new store has been created. In Storefront URL you can enter the URL from where you want to sell your products.
Also, be sure to complete the Cpanel process before accessing the configured URL.
This is all that you need to do in the admin.
There are three ways by which you can configure the URL of the storefront.
1. Subdomain
2. Subdirectory
3. Entirely different URL i.e. different domain
Let us discuss all these in detail for a better understanding.
1. Subdomain
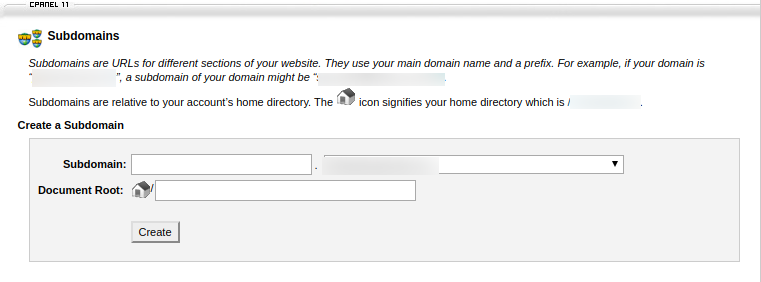
If you are planning to show your storefront at a subdomain of your main site like new.abc.com, follow the following points to set up the new storefronts.

Go to your Cpanel and click on subdomains and fill in the information like subdomain name like here type “new” and in document root type “public_html”.
2. Subdirectory
If you want to make the URL of your storefront to a sub-directory of the main store, you only need to create a store in the admin. This is the simplest method of creating a new storefront. Visit the new URL and your data will appear there.
3. Entirely different URL i.e. different domain
If your CS Cart is installed on location A and the new website/storefront is on location B, then the new storefront domain should point to the site A. To do so, follow the steps mentioned below:
i) Find the nameservers of your domain where CS Cart is installed. You can either check nameservers by going to your Cpanel or you can also search on https://www.whatsmydns.net/. Type the site name and select A from the dropdown you should now see the nameservers of your CS Carat installed domain. Copy that value.
ii) Go to the new storefront domain and go to the DNS configurator. All your domain list will appear there click on Edit and enter new nameservers that you have copied before and click Edit record to save data. This may take up to 48hours.

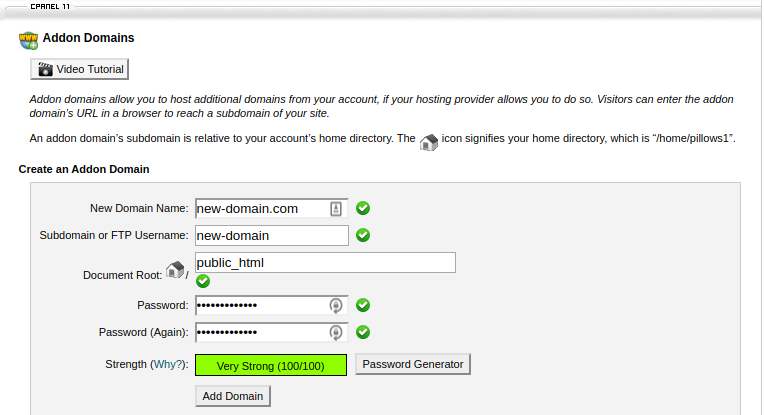
iii) Now go to your domain where CS Cart is installed and you should see “Addon Domains” in domains sections click on “Addon Domains” and follow the steps mentioned in the screenshot.

In New Domain Name, enter the new domain URL where you want to sell your products. In Document Root, enter public_html and enter the password and then click on “Add Domain” and you are all set. The newly created domain will show up in the Modify Addon Domain section.
Visit the new storefront URL and you will see your site there if your DNS has been propagated properly.
If you want to hire an expert to tell you all about it and help you make a decision about CS-Cart development, we are just a click away – Submit your query for CS-Cart development with us. We will make it quick and easy for you!


