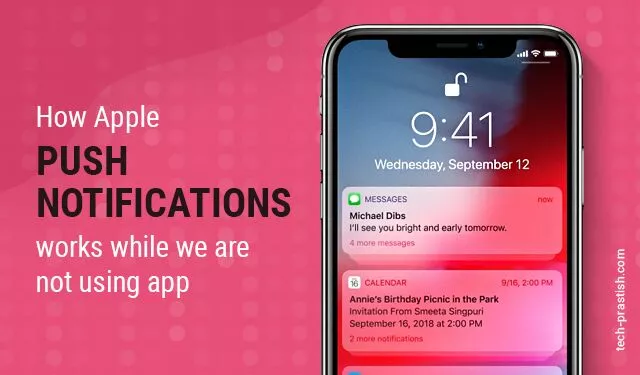
Notification is a way to inform a user about the arrival of new data in an app, whether or not running in the foreground.
Types of notifications
Notifications can mainly be classified into two categories:
- Local notifications
- Remote notifications (Apple Push Notification)
Below mentioned are the steps for creating Apple Push Notifications(APN):
Step 1: The Certificate Signing Request
First, we’ll produce a Certificate Signing Request (CSR) file that we’ll use later to create a push notification SSL certificate. You’ll need Keychain Access for this step.
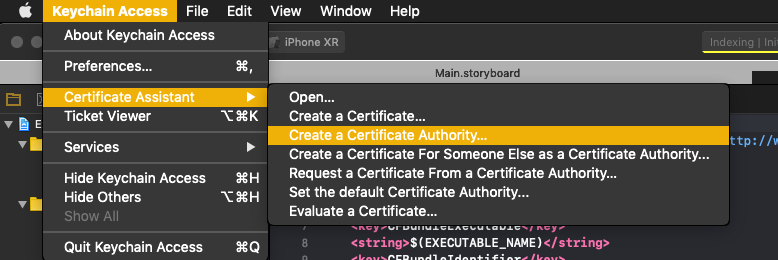
Once you get there, open the Keychain Access > Certificate Assistant > Request a Certificate From a Certificate Authority… menu, as shown below:
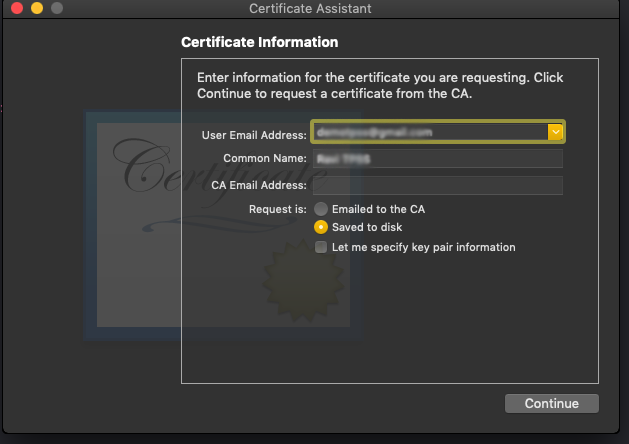
In the window that comes up next, fill the user email address and common name fields. Also in the same screen, select ‘saved to the disk’ option, so that you are able to save the CSR file to disk and use it later in the Apple Developer website.
Click the “Done” button once you see a message displaying that your request was created on the disk.
Step 2: Create an App ID
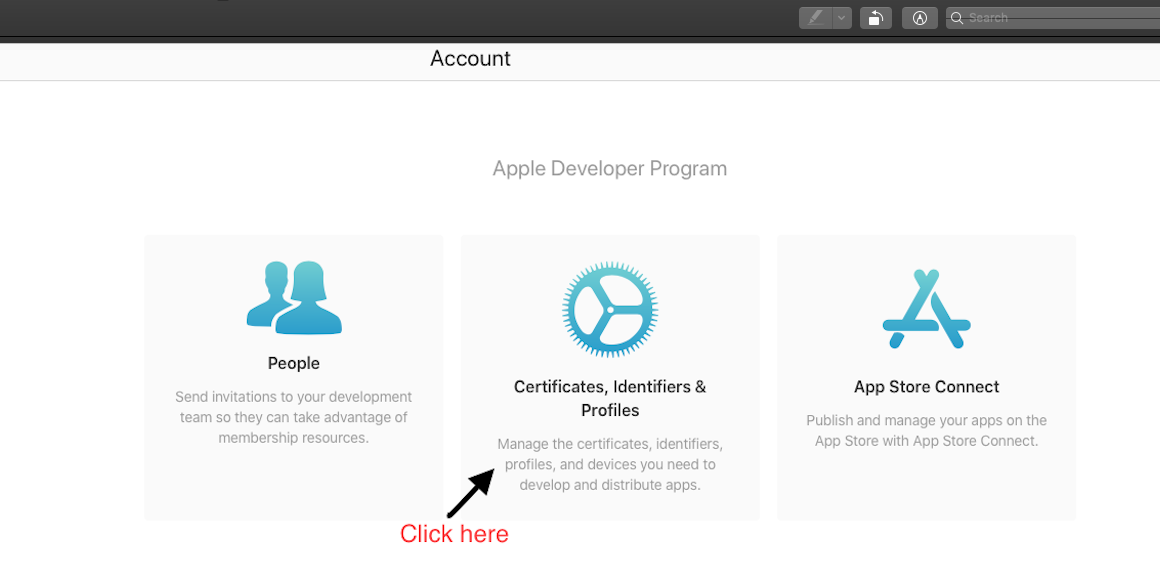
Our next step is to create a new App ID in the Apple Developer website. Begin with the most important things first by going to the Apple Developer Member Center. Provide your credentials and get connected. Then, click the “Certificates, Identifiers & Profiles link” to navigate to the next page.
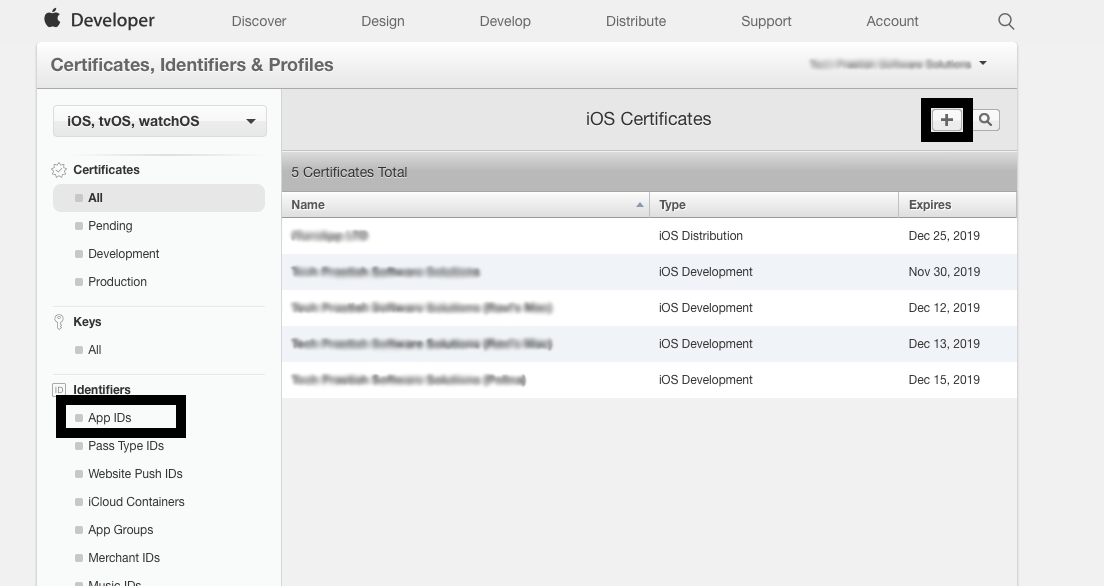
Now you’ll see the App IDs option in the left menu in the Identifiers category and the list of App Ids in the window area. The new App ID that we’re about to create will be added to that list but first, let’s click on the top – right button:
For Beginners, we need below-mentioned fields:
-
- A description of the new App ID.
- The Bundle ID of the app. Just copy that value from your Xcode project, and paste it here.
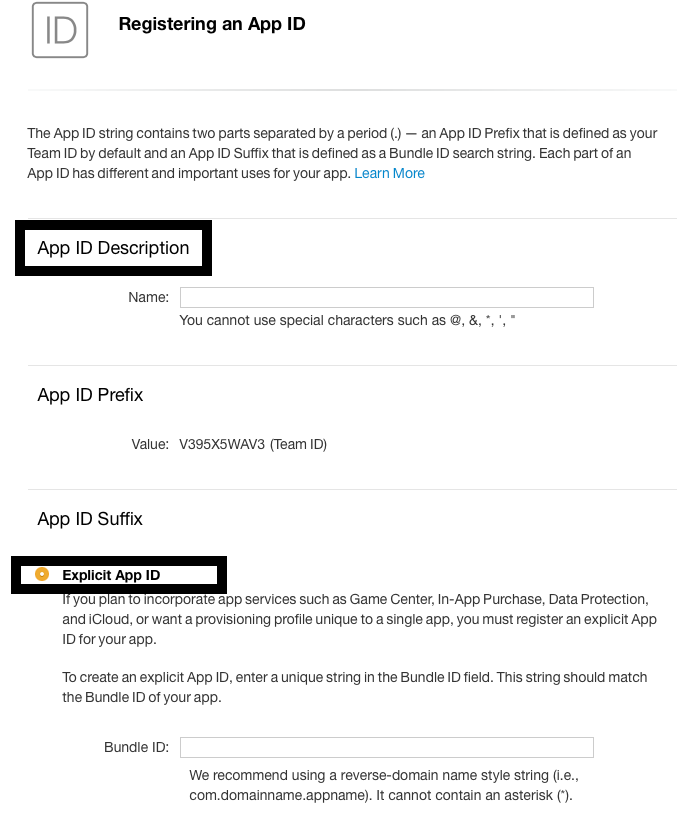
You must also set an explicit App ID when enabling push notifications, as the App ID must match specific bundle ID applications.
Scroll down until you reach the App Services area after setting the above values. You will find the push notifications option at the bottom of the services provided. To mark it as selected, click the checkbox.
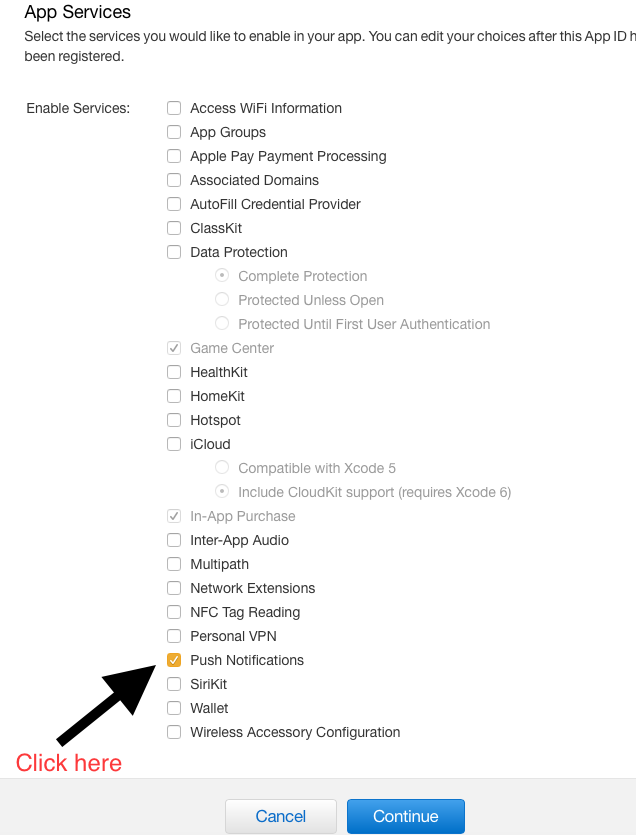
The last step here is to see the Registration Complete page. Just click to the Done button, and you’ll see the new App ID is listed in the App IDs collection.
Step 3: Configure the App ID for Push Notifications
Going forward, make sure that you remember the new App ID or write it somewhere because if you forget it, the file becomes unusable when you click on the newly created App ID in the list to expand it. There is “Edit” button right after all the services displayed, to proceed, click it.
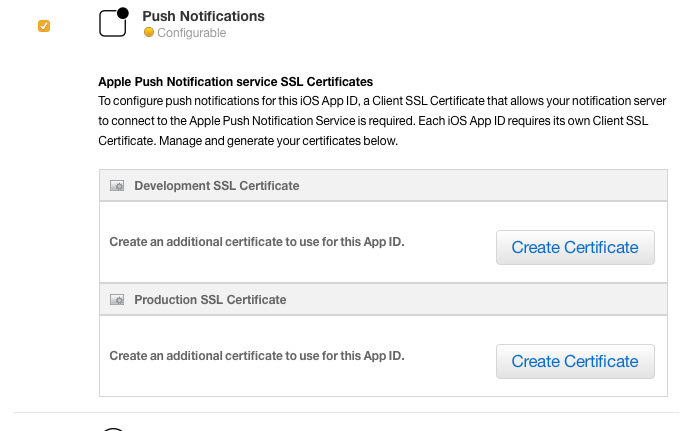
Scroll down in the next step until you see the section on Push Notifications. There you will find two buttons that you can use to create SSL certificates for both the stages of development and production. Since we are only interested in the mode of development, click on the first button as shown below:
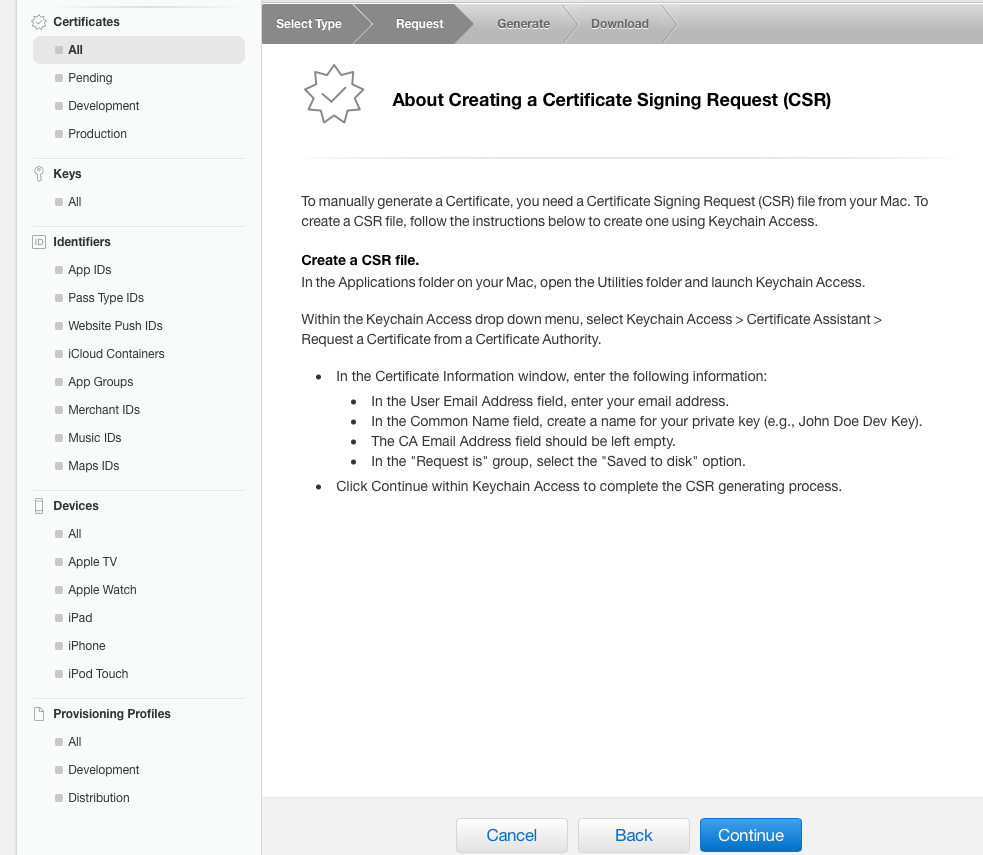
To continue with the process, click the “Continue” button in the first step. Here you will find a set of instructions on how to generate the CSR if you haven’t done that already.
Next, click the “Choose File…” button so that you can search for the CSR file that you generated in the first step. CertificateSigningRequest.certSigningRequest.

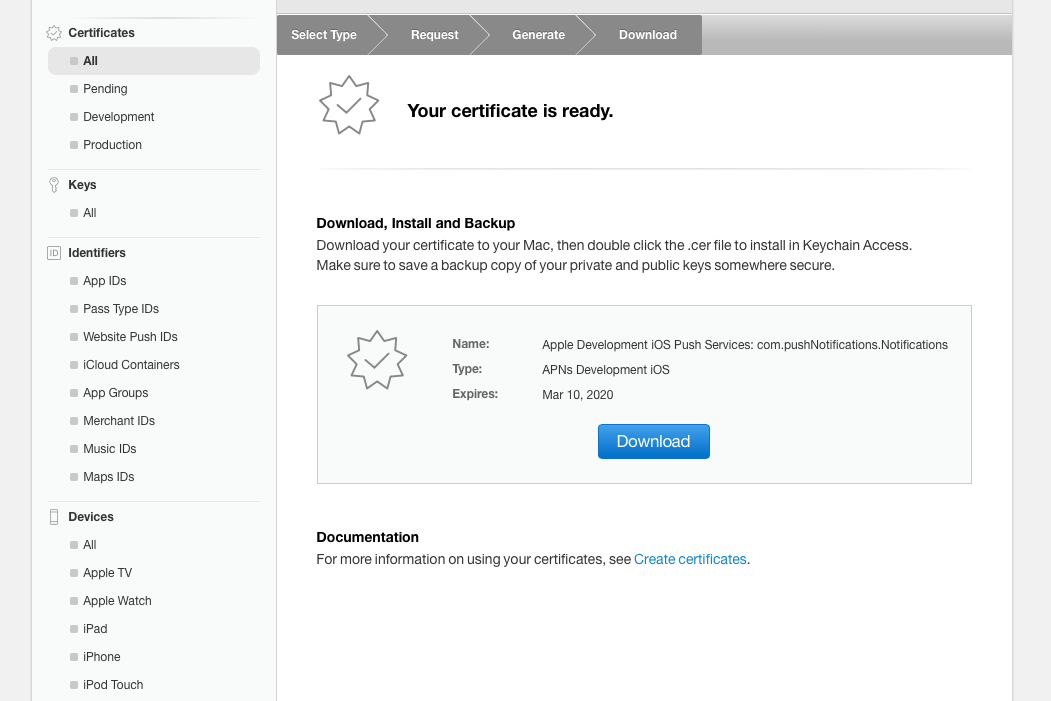
Now, you’ve just created a new certificate that will allow you to send development (sandbox) mode push notifications. You need to download it now and add it to the keychain (the Mac Keychain Access app) so, click the Download button to proceed.
The file you just downloaded is named aps_development.cer. Double click on it, so it’s added to the collection of certificates in the Keychain Access app.
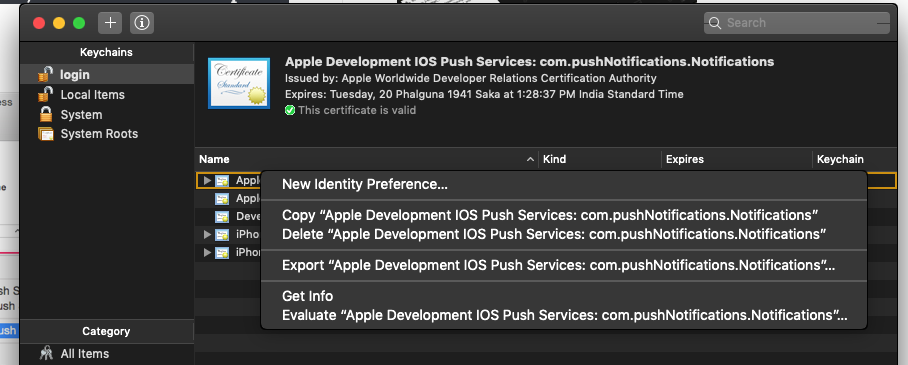
When the keychain access app opens by double-clicking to the .cer file, make sure that the new certificate is added to the login keychain.
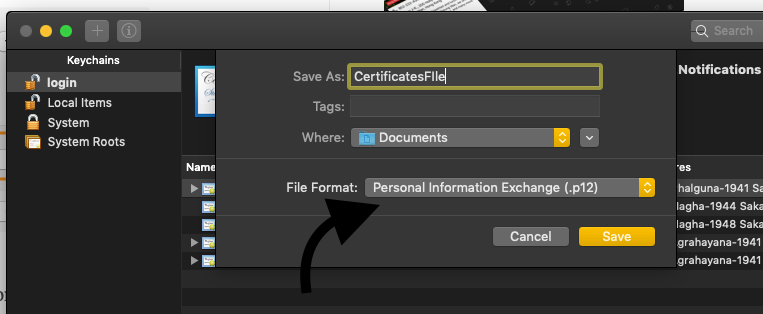
Once you locate the new certificate in the Keychain, right-click on it, and then click on the Export “…” option.
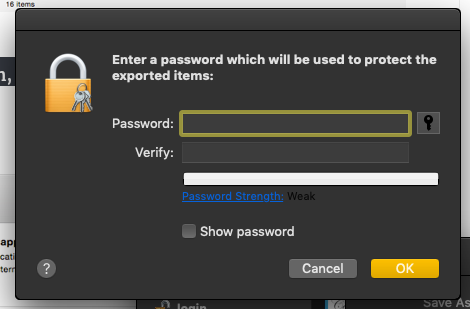
Make sure that the .p12 file format is selected before you click the “Save” button.
You can skip setting a password simply by clicking the “OK” button in the next window. If you set one, make sure to remember it or write it somewhere, because the file becomes unusable if you forget it.
Step 4: Register Your Device
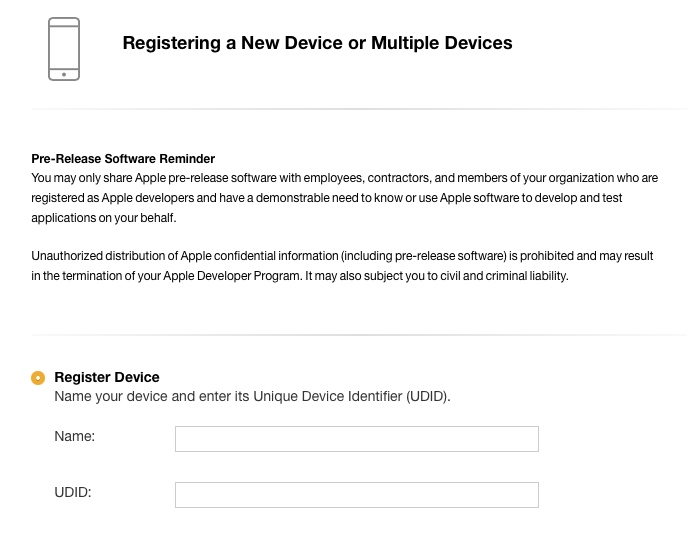
In the next step, we’ll add our device’s UDID to test the app on a particular device. If you’ve already done that in the past and your device is already listed there and you can skip this step.
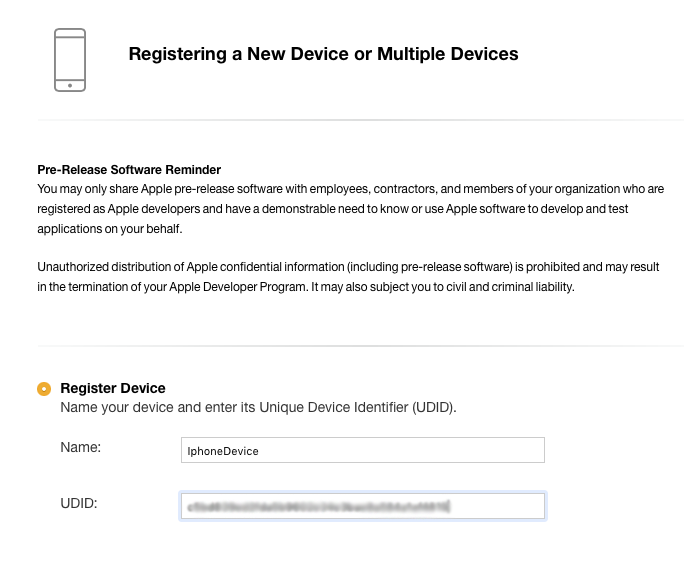
Now go to the Apple Developer website, and click the “All” option under the Devices category. In case there are some already registered devices, they will be listed in the main window area. To add a new device, click the button with the plus icon (+) on the top-right side.
In the new page that appears, first set a name for the device in the Name field. Then paste the device identifier you copied before in the UDID field and you’re done.
You can verify that your device has been added to the list with the registered devices by clicking once again the “All” option in the Devices category.
Step 5: Create a Provisioning Profile for Development
On the Apple Developer page, click the Development link in the Provisioning Profiles category. Any existing profiles will be shown in the main window and in a few minutes, our new profile will also be added there. To create a new provisioning profile, click the plus (+) button on the top-right side of the window, once you select the appropriate option, use the “Continue” button to move to the next step.
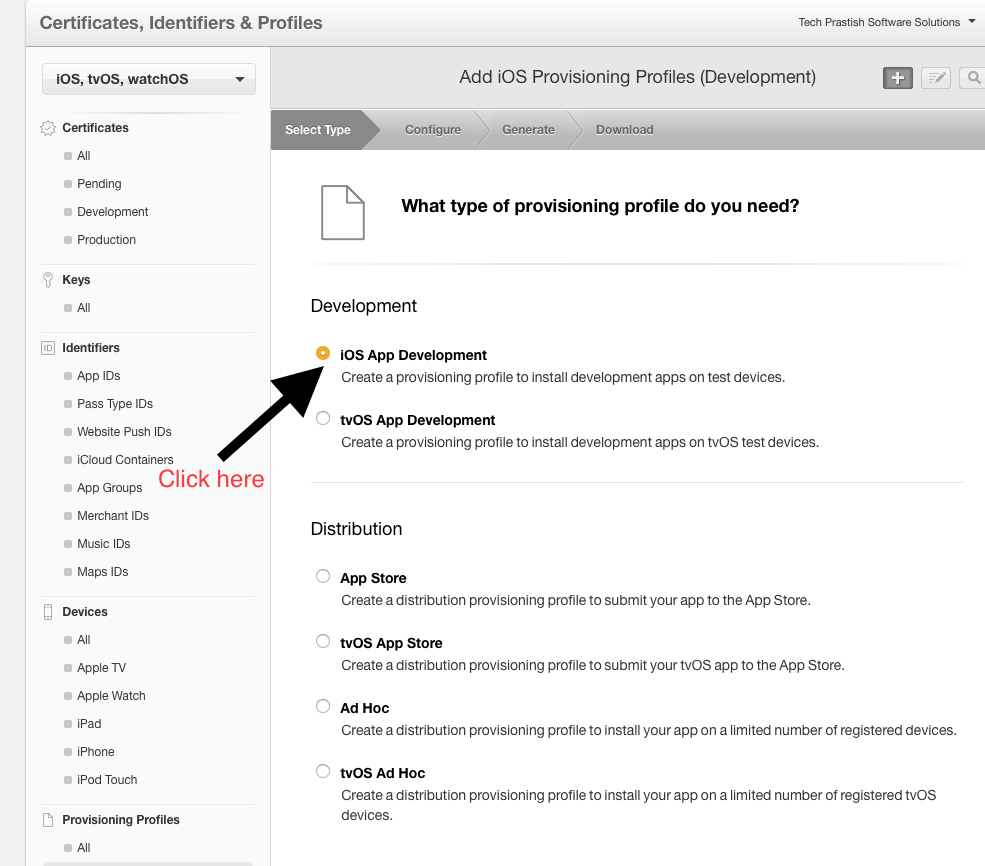
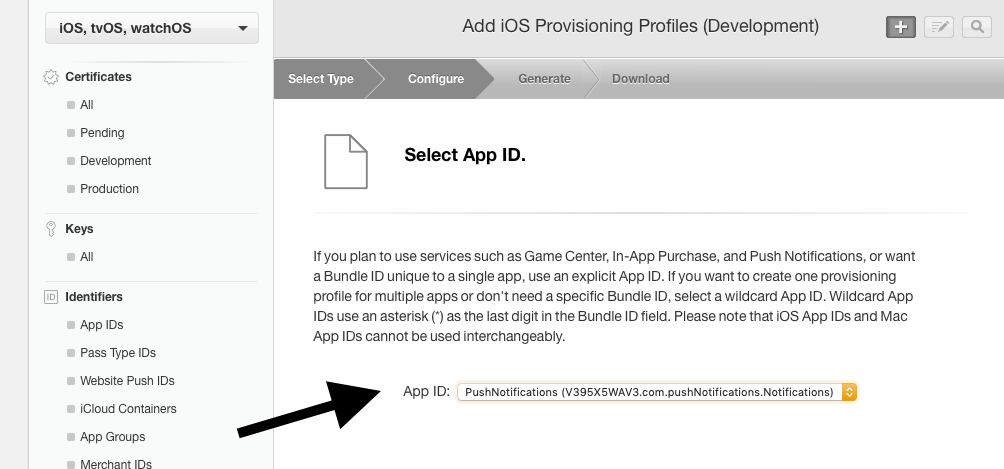
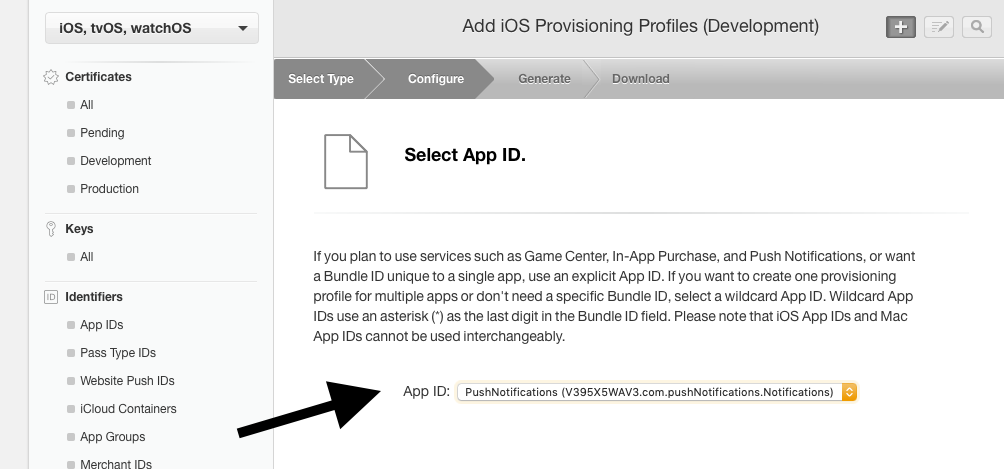
Then connect the profile we are creating to the App ID matching to your app. Locate and select the relevant app ID value in the dropdown and go ahead.
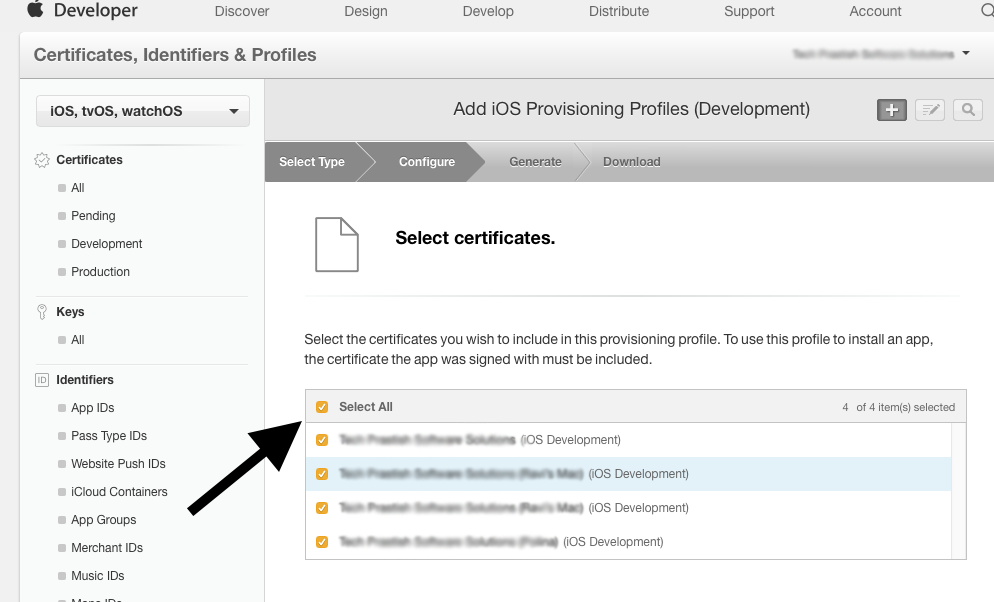
In the next step, you will need to include your IOS Development certificate to the Provisioning Profile and for that, simply check all Checkboxes.
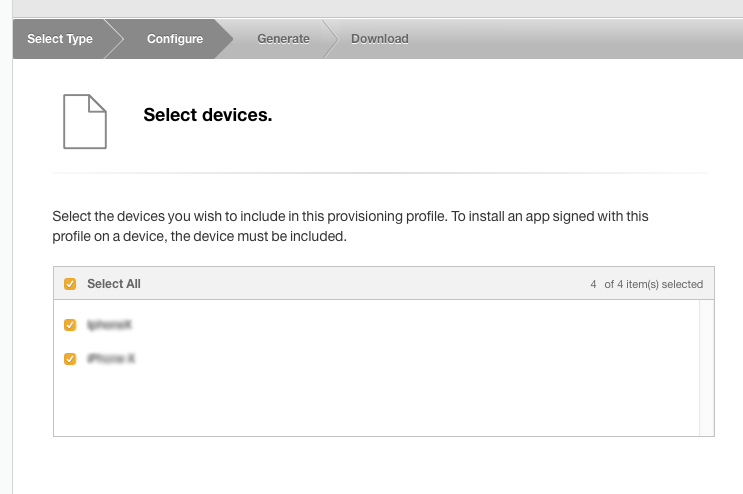
Next, select one or all the devices which the app is going to run on.
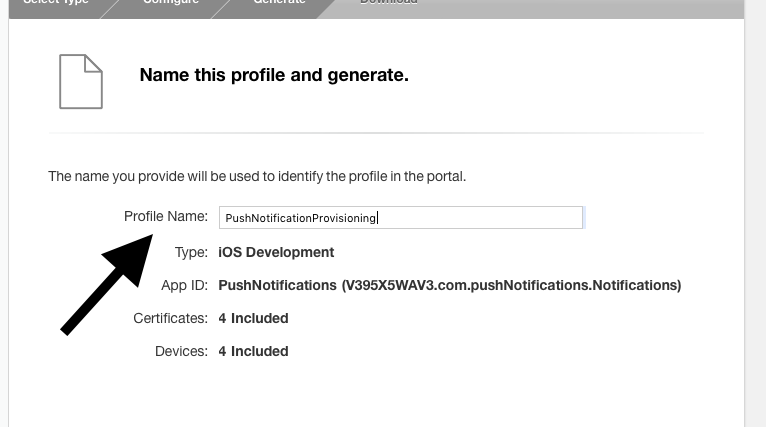
At Last, name your Provisioning profile so that you can differentiate your profile from others. I named it as “Push NotificationProvisioning Profile”. You may name it the way you want.
Click on Download button, When the new profile gets ready, you’ll be able to download it as shown below:
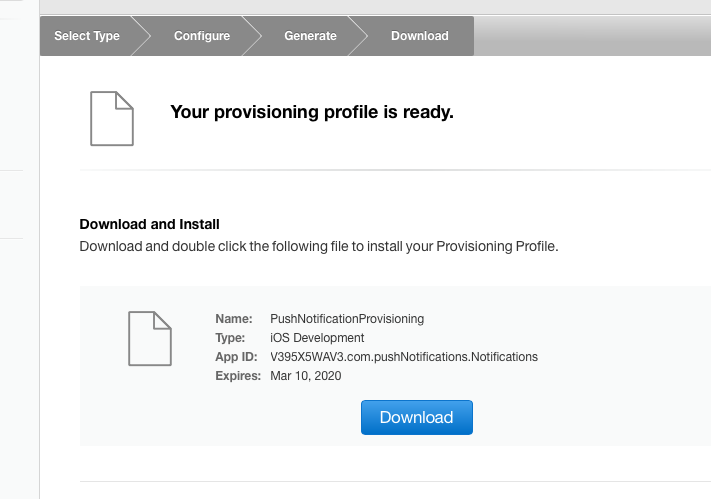
All you have to do now is double click the downloaded file and follow the instructions.
Step 6: Configure the Project
Now, we must enable the Push Notifications capability in the project, so that we can actually get notifications on any device. We also need to set the values for both code signing and provisioning profiles which is used by the app. Open the app in Xcode and select the project in Project Navigator. Go to the “General” tab, and select the team that will be used for provisioning.
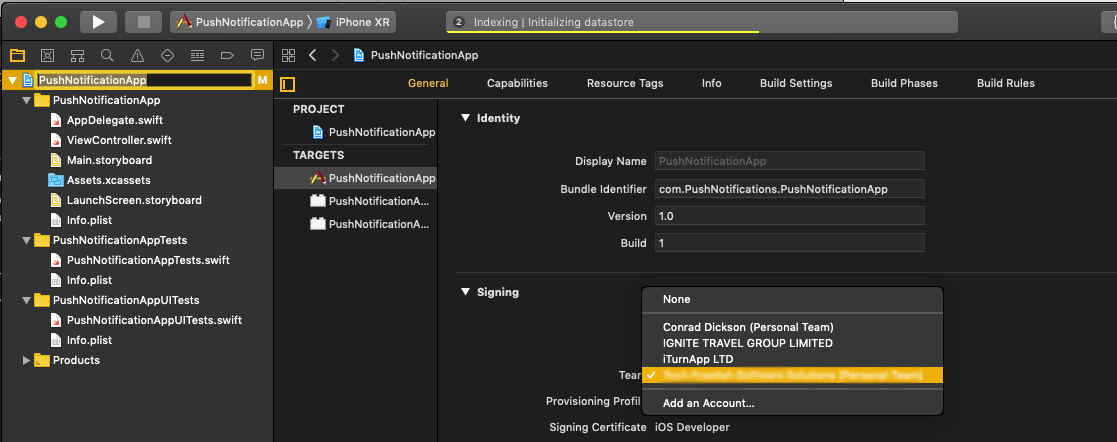
Next, click the “Capabilities” tab and switch on the background mode section, select the remote Notifications.
Go to the Code Signing section and select the Development Team and provisioning profile for the Debug mode.
Step 7: Register for Push Notifications
We are almost done with project configuration in the Apple developer account. Now we are making an app and going to register for push notifications. We are also setting the sound, badge and alert message. Open the AppDelegate.swift file and go to the application(_:didFinishLaunchingWithOptions:) method.
func application(_ application: UIApplication, didFinishLaunchingWithOptions launchOptions: [UIApplicationLaunchOptionsKey: Any]?) -> Bool {

   application.registerUserNotificationSettings(pushNotificationSettings)
    application.registerForRemoteNotifications()

    return true
}
We are Calling registerForPushNotifications. ‘()’ here ensures the app will attempt to register for push notifications any time it’s launched.
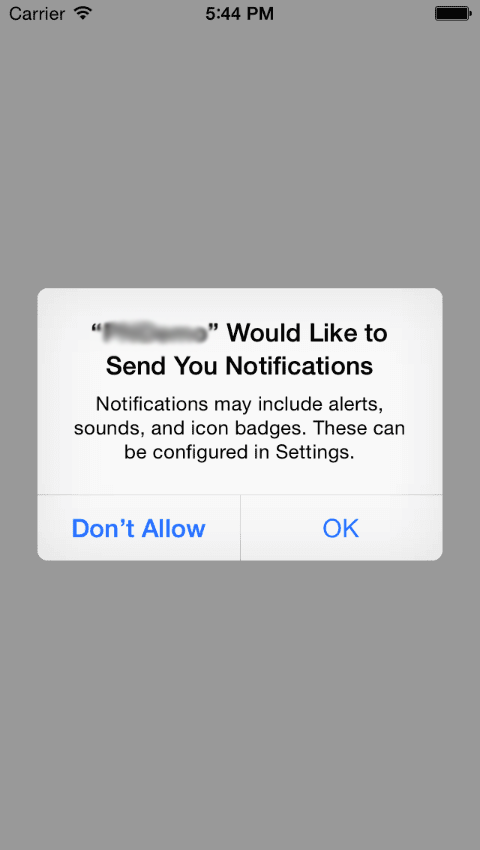
Build and run: When the app launches, you should receive a prompt that asks for permission to send notifications.
Step 8: The Delegate Methods
We need to register push notifications, but similarly, we execute the implementation of some useful delegates methods that respond to received notifications.
First, we implement the delegate method application in your AppDelegate Class(_:didRegisterForRemoteNotificationsWithDeviceToken:) The current implementation of application(_:didRegisterForRemoteNotificationsWithDeviceToken:) but it’s simply taking device Token and converting it to a string. It’s provided by APNs and it uniquely identifies this app on this particular device. While sending push notifications, the server makes use of tokens as “addresses” to deliver to the correct devices. In your app, you would now send this token to your server, so that it could be saved and later used for sending notifications.
You should receive a token in the console output. Here’s an example:

To handle the case for receiving push notifications, add the following method to AppDelegate:
func application(
  _ application: UIApplication,
  didReceiveRemoteNotification userInfo: [AnyHashable: Any],
  fetchCompletionHandler completionHandler:
  @escaping (UIBackgroundFetchResult) -> Void
) {
  guard let aps = userInfo["aps"] as? [String: AnyObject] else {
    completionHandler(.failed)
    return
  }
  NewsItem.makeNewsItem(aps)
}
Kindly note when you run the app for the first time, you’ll be asked to allow remote notifications. You need to allow them if you want to test them. The image below illustrates how to allow remote notifications:
In the “Payload field” you need to specify the details of the push notification. For example, if you want to receive a message, badge number and the default sound here’s what you should receive in payload structure:
{
  "aps": {
    "alert": "Push Notification!!",
    "sound": "default",
    "link_url": "https://PushNotifications.com",
    "category": "User_Category"
  }
}
Now that you are done with the complete process, you are ready to send a push notification. All you have to do is to click the “Push” button.
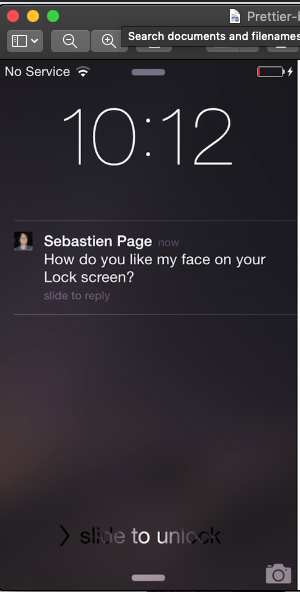
You can send push notifications various times to see how does it appear when the device is locked or the app is not in running state or when you open the notifications center on the device.
Found the article useful? Share it with your friends and co-workers… Now!
If you have any queries or doubts about this topic or if you’d like help getting push notifications on your website, please feel free to contact us.


