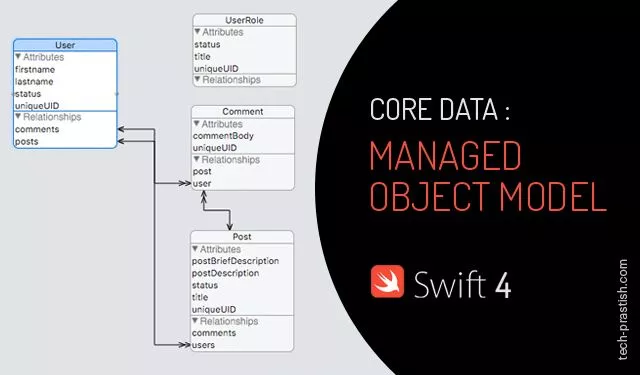
What is the Managed Object Model?
Managed Object Model is used to manage the schema of the CoreData. When we use Coredata in our applications then Xcode creates a file with extension .xcdatamodeld. In our case, it is Blogger.xcdatamodeld file. This file is used to create core data schema. Coredata schema defines various entities, attributes and relationships between them and represented by an instance of NSManagedObjectModel. Schema maps the records stored in the Persistent store and the ManagedObjects used in our application.
In my previous article Core Data: Core Data Stack in Swift, we have learned about the Coredata Stack. There we had created a demo app named Blogger. Now in this article, we will learn how to manage entities, attributes and relationships between entities.
CoreData Managed Object Model
In this tutorial, we will learn about the following topics:
- .xcdatamodeld File
- Entities
- Attributes
- Relationships
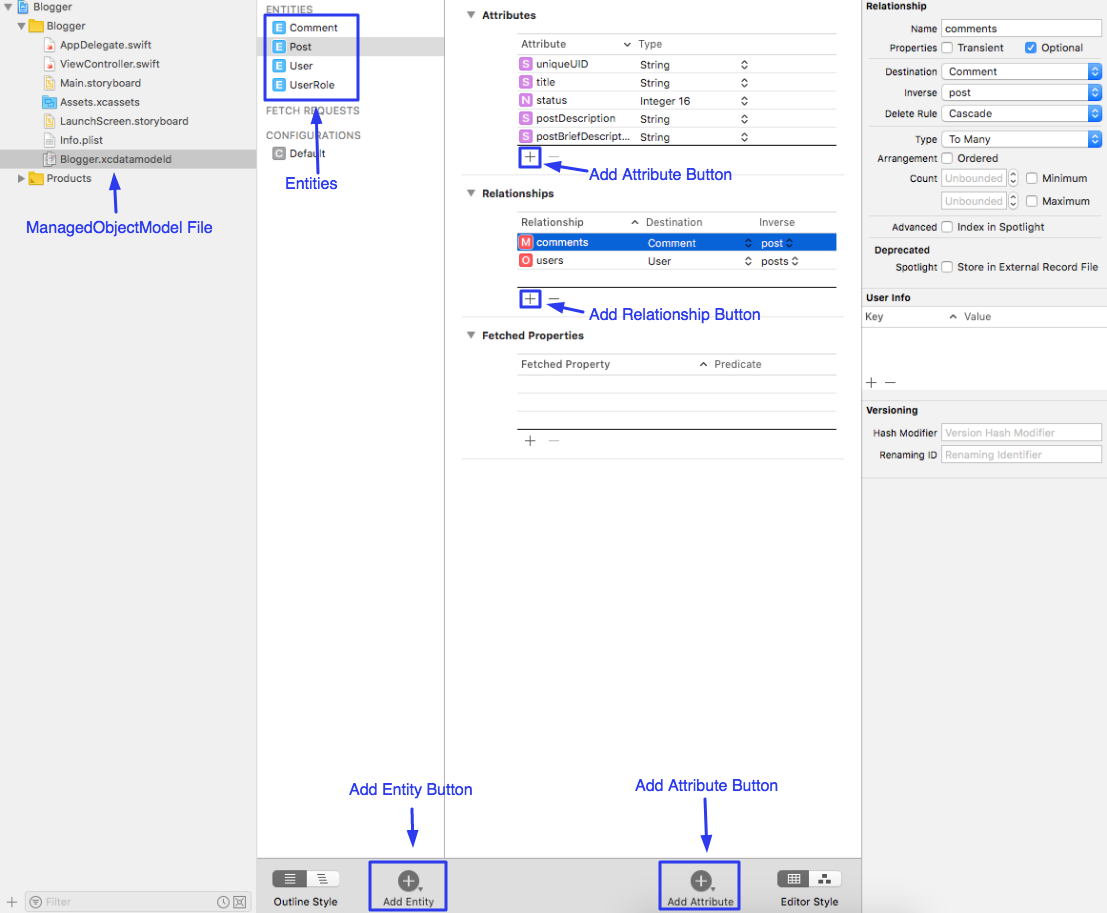
.xcdatamodeld File
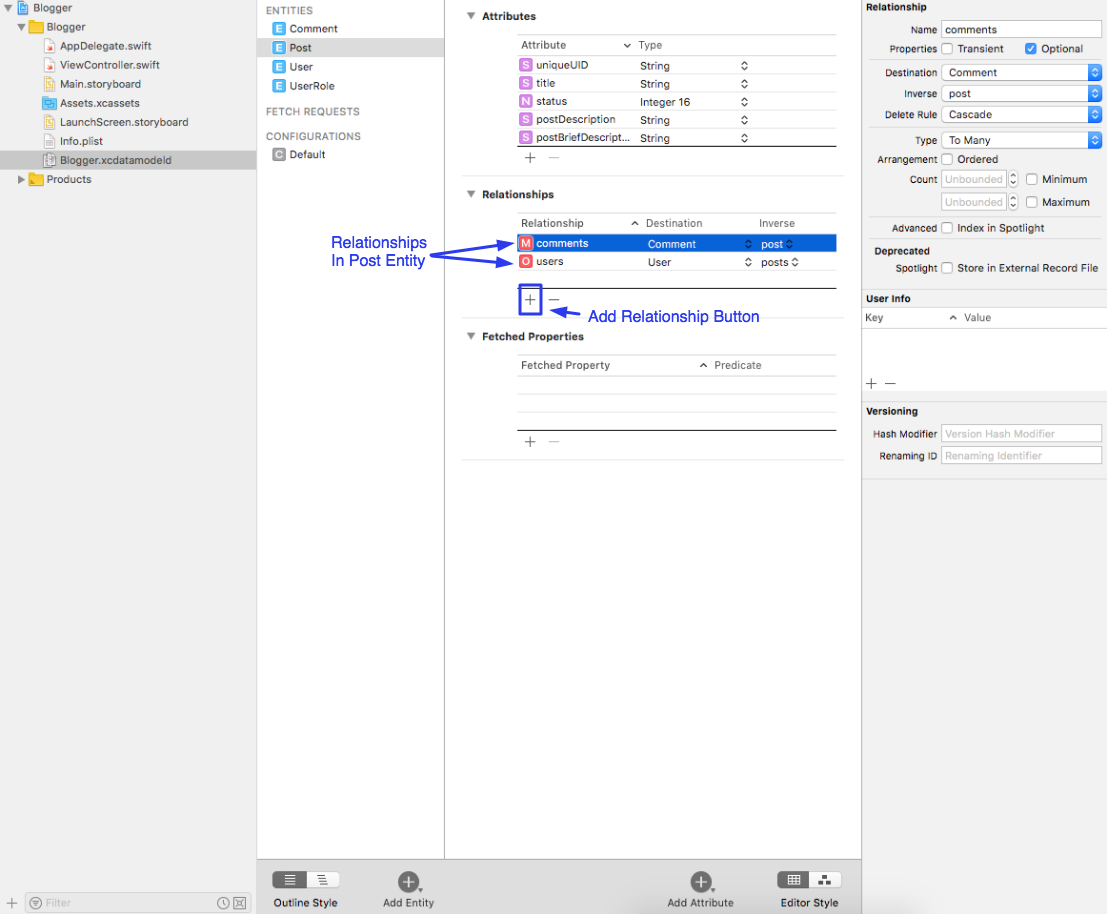
.xcdatamodeld file is created by Xcode. This file provides interface to add entities, attributes and relationship between entities. The following diagram shows various parts of the .xcdatamodeld file
Entities
An entity represents a unique unit of data. Each entity is distinct from other entities and has its own attributes. Let’s consider the example of an app for School. If we want to manage the data of a school then first we have to identify various entities. School data can be categorized as follows:
Staff (Users), UserRoles(Principle, Teachers, Students, Clerical, etc), Classes, Sections, Subjects(Maths, Physics, Chemistry, English, Hindi, Punjabi, Drawing, etc). So all the above-mentioned categories can be considered as entities in Coredata.
In our Blogger App, we have Users, Roles, Posts, Comments
Attributes
Attributes represent various properties of an entity. For example, the User entity can have a first name, last name, role, address, uniqueId, etc. Similarly, posts can have a title, subtitle, brief description, description, last created date, last modified date, unique ID, featured image, etc. depending on the requirements of the App.
Relationships
Entities can have relationships with other entities. For example, users can have multiple posts, each post can have multiple comments, each comment will relate to a particular post, each user can have multiple comments, etc. Each entity can have a to-many or to-one relationship with another entity. Therefore, we have to consider various things while creating relationships between entities.
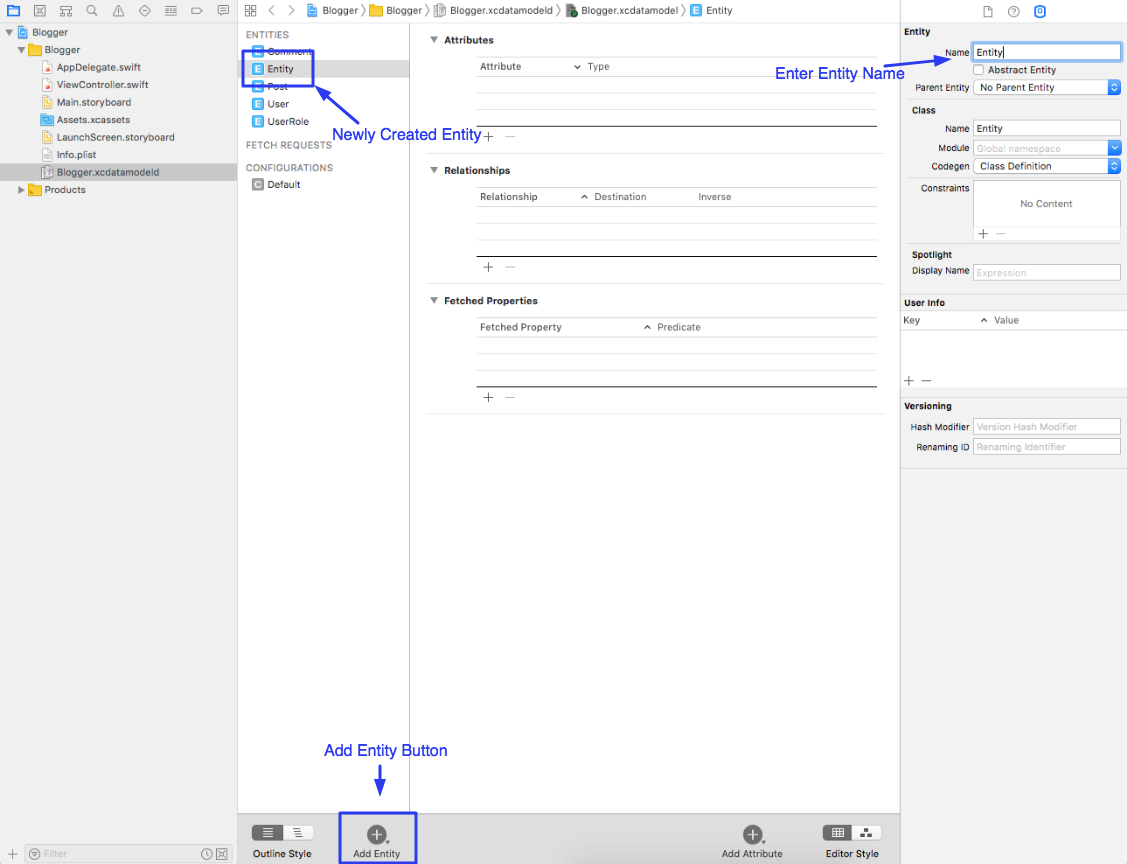
Add Entity:
1. Click the Add Entity button in the editor area
- 2. Give a name to the entity e.g. User
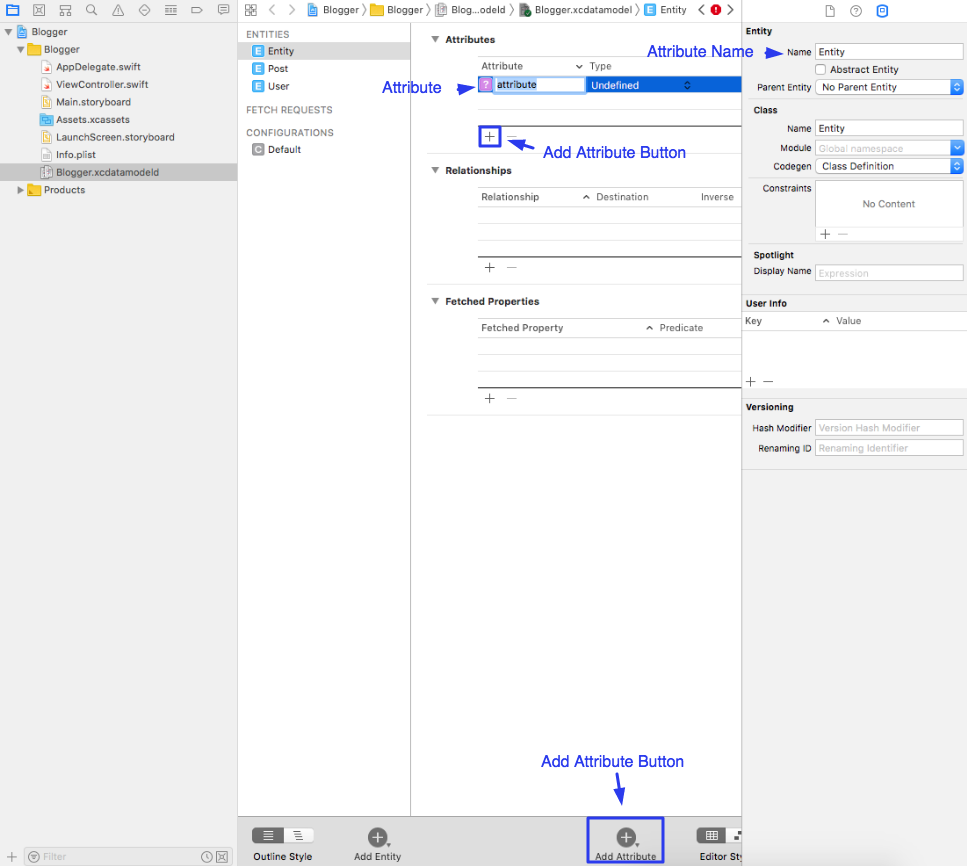
Add Attributes:
1. Select the entity you want to add attributes to.
- 2. In the editor, there are three sections Attributes, Relationships, and Fetched Properties. Under Attributes click the “+” button. It will create a new attribute. Give it a name and select the type of the attribute. E.g. first name with type String.
Add Relationships:
1. Select the entity you want to add a relationship to
- 2. Under Relationships click the (+) button. It will create a new relationship. Give it name and destination and inverse relationship if any. For example, Users can have many posts. You can create a posts relationship for the User entity. Posts relationship will have destination post and it will be a to-many relationships.
In this article, we learned about Managed Object Context or core. Feel free to seek any further clarification.
Stay Tuned: To learn how to save and fetch data from CoreData in my next article!
Thank you!!


